Complete The Duke Rules
Start with what a turn allows and how the game is won.
- Board
- 6 × 6 squares
- Army
- 19 tiles per side
- Turn
- One maneuver or one levy
- The armyeach side has nineteen tiles — one Duke, three Footmen, three Pikemen, and one each of Knight, Wizard, Ranger, Seer, General, Priest, Champion, Marshall, Bowman, Dragoon, Assassin and Longbowman. The Duke and two Footmen begin on the board; the other sixteen (one Footman, three Pikemen and the twelve specialists) go into that player's own bag and can only reach the board by levy.
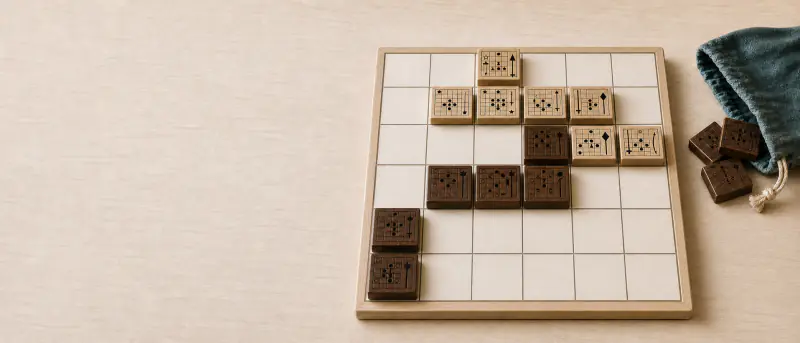
- Setupplace your Duke on either of the two center squares of your home edge, then place two Footmen on empty squares orthogonally adjacent to it; both armies set up symmetrically across the board and the light side moves first. Here you place your own three tiles and the computer answers with the mirrored standard setup.
- One action per turnevery turn is exactly one maneuver or one levy, and passing voluntarily is not allowed. A maneuver plays one mark from the grid on the face currently showing, and when it resolves, the tile that acted must flip to its other face. A levy draws a reinforcement and deploys it, described below.
- Reading the markson the grid, a filled circle is Move, a hollow circle is Jump, a filled triangle is Slide, a hollow triangle is Jump Slide, a star is Strike, and the loop symbol is Command; the diamond in the very center is the tile's own square. Triangles point along the direction of the slide, and every other mark sits on the square that action targets.
- Move and Jumpa Move requires the straight path between the origin and the marked square to be clear, while a Jump ignores everything along the way and lands directly on its marked square. Neither may land on a friendly tile, and landing on an enemy tile captures it.
- Slide and Jump Slidea Slide extends outward from the adjacent square in the printed direction and may stop on any empty square along that ray; a friendly tile stops it one square short, an enemy tile may be captured and the slide ends there. A Jump Slide skips the adjacent square entirely and begins on the second square — the printed mark itself — then follows the same rule, so a tile next to the actor neither blocks it nor can be captured by it.
- Strikethis action is only available when an enemy tile actually stands on the marked square. It captures that tile outright while the striker stays where it is, though the striker still flips. If the marked square is empty, a Strike is not available, and it can never be used as a way to move.
- Commandevery square marked with the loop symbol on the commander's visible face forms its command area. You may relocate one friendly tile from one square of that area to another, ignoring anything in between; an empty destination is a move, an enemy tile there is a capture. Only the commander flips — the tile it relocated keeps the face it was already showing, and the commander itself stays put.
- Capturing and Guardany action that lands on an enemy tile captures it, captured tiles are out for good, and capturing the opposing Duke wins immediately. The rules also forbid any maneuver that would leave your own Duke capturable at once, which is why a tile can carry marks and still be unable to move a single square: moving it would expose the Duke.
- Levyyou may levy while your bag still holds tiles and at least one of the four squares orthogonally adjacent to your Duke is empty. The drawn tile is revealed immediately and must then be deployed, starting face up, onto one of those empty squares; drawing and deploying together are one full turn, and the new tile cannot act on the turn it arrives. Levy also stays legal while your Duke is under attack, but the drawn tile must be placed and the threat does not clear itself.
- Losing and drawinga player who begins a turn with no legal maneuver and no legal levy loses. This implementation adds two digital adjudications on top: the same full position occurring a third time is a draw, and 200 consecutive turns without a capture or a deployment is a draw. Both are explicit online rulings, not text from the 2013 base rulebook.
How to Play The Duke: Your First Game
Use this order of thought to get through a complete game quickly.
- Select first, then plan: clicking one of your tiles highlights every legal destination from the face it is currently showing, so you never have to memorize all thirty action grids up front.
- Check the reverse before committing: the small grid at the bottom of the detail panel is the face this tile will show after it acts. Where it lands matters, but whether it still contributes after flipping usually decides whether the move was worth it.
- Click enemy tiles to inspect them: selecting an opposing troop outlines every square it can currently reach or affect in blue-violet. It is by far the fastest way to answer "would I be captured on that square?".
- Orange-red squares are forbidden: once your Duke is selected, destinations that would let it be captured next turn are drawn in orange-red with an exclamation badge. Clicking one explains the danger instead of playing it.
- Keep one square open beside the Duke: as soon as all four orthogonally adjacent squares are occupied, levy stops being available, even with a dozen strong tiles still sitting in your bag.
- Read enemy tiles upside down: the interface rotates the opponent's tiles by 180 degrees exactly as two players would across a table, so the forward direction printed on them points toward your own home edge.
- Separate Slide from Jump Slide: a Slide is counted from the adjacent square outward, a Jump Slide from the second square outward. Mixing them up is the most common way beginners imagine a threat that does not exist.
The Duke Strategy
Move from knowing the rules to playing with a plan.
- Treat every tile as a two-state machine: a destination is only strong if the face revealed on arrival still contributes to the position, otherwise an apparently active advance simply parks the tile for a turn.
- The Duke is two-sided too: its starting face slides only sideways, its reverse face slides only forward and back, so its coverage rotates ninety degrees with every step. Plan its escape route two moves deep or it will step onto a square the next face cannot leave.
- Blockade the levy squares: the four squares around the enemy Duke are both its escape routes and its only supply line. Occupying or attacking them makes it far harder for the opponent to turn bag resources into board presence.
- Weigh levy against every maneuver: it costs a full turn and the draw is uncertain. Levy when several remaining tile types would improve your position, not when only one lucky draw would rescue it.
- Use Strike and Command for tempo: Strike removes a defender without giving up the striker's square, and Command relocates a friendly tile without flipping it. Neither timing can be reproduced by an ordinary capture-and-flip move.
- Attack the Duke with follow-up: the attacking tile should still cover the Duke's escape squares after it flips. An assault that falls apart on the first flip is usually easier to answer than a quieter move with lasting coverage.
- Track the bag by multiplicity: Footmen and Pikemen may still have several copies left while each of the twelve specialists is unique. The bag counter is public, so levy odds can be calculated rather than guessed.
The Duke Winning and Special Rules
Details that are easy to miss but can change the result.
- Grids are always read from the controller's side: forward means toward the opponent's edge, and each side reads its own directions. This page turns the board and the tiles toward you, so your own troops always read upright while enemy troops always read upside down.
- Only the acting tile flips: a captured tile never flips on its way off the board, a tile relocated by Command keeps its face, a newly levied tile always arrives on its starting face, and only the troop that performed the action turns over.
- Levy stays legal in Guard: when your Duke is attacked the interface flags it as Guard. You must answer the threat with a legal maneuver, yet levy remains available while an empty square borders the Duke — the drawn tile must still be placed even if the threat survives.
- The action vocabulary is fixed: Move, Jump, Slide, Jump Slide, Strike and Command share one compact 5 × 5 visual language but resolve in six different ways, and no tile face mixes in any other kind of action.
- 2013 base set onlythis page implements the nineteen-tile core army and nothing else — no Musketeers, Arthurian troops, promotional characters, terrain tiles or other expansion material.
Common The Duke Rules Mistakes
The traps new players fall into most often.
- Playing a Move as though it were a Jump: a Move may not pass through any piece, and only the hollow-circle Jump marks ignore whatever stands along the way.
- Sliding past the first piece met: the first occupied square on the ray is always the end of a Slide — a friendly tile stops it just short, an enemy tile may be captured there, and neither case continues further.
- Forgetting that the actor flips: after the move resolves, that tile is using the other grid entirely, so planning next turn from the face you just played is guaranteed to fail.
- Treating levy as a bonus action: drawing plus deploying is the whole turn, the arriving tile cannot move afterwards, and you do not also get a maneuver.
- Commanding a tile to any empty square: both the origin and the destination must be command-marked squares on the commander's visible face, not simply free space nearby.
- Copying the opponent's orientation: every grid is read from its own controller's home edge, so the same troop points in opposite screen directions in the two armies.
The Story of The Duke
Where it came from, and why it turned out this way.
DesignJeremy Holcomb and Stephen McLaughlin · 2013 · Catalyst Game Labs
A skirmish written on the pieces
Jeremy Holcomb and Stephen McLaughlin designed The Duke around a striking physical idea: the rules for a troop are printed directly on its two faces. The 2013 Catalyst Game Labs edition turns a 6×6 board and a small wooden army into a readable tactical system. There is no separate reference chart to consult during ordinary play; pick up a tile, examine its visible grid, and its present possibilities are already on the table.
Every maneuver changes the mover
Most abstract games let a piece keep one identity for the whole match. In The Duke, movement is also transformation. A Footman that advances or a Wizard that jumps is flipped, revealing a different profile for its next turn. That simple physical gesture makes tempo visible: the price of occupying a good square is accepting the capabilities printed on the other face. Strong play therefore links two positions at once — where a troop will land and what it will become there.
An army arriving by handfuls
Only the Duke and two Footmen begin on the board. The remaining sixteen tiles wait in a private bag, and a player may spend a turn levying one at random beside the Duke. The draw introduces uncertainty without hiding the board position: both players can see every deployed face and can count what remains possible in each bag. The result sits between combinational tactics and probability management rather than becoming a game of secret information.
The wooden object is part of the interface
The production's square wooden tiles are not decoration placed on top of the rules; their thickness, orientation, and printed movement grids explain how the game works. Opposing armies are rotated toward their owners, a spent troop is literally turned over, and captures accumulate beside the board. This implementation preserves those physical cues with original digital artwork instead of copying the published silhouettes, logo, distressed frame, or wood texture.
- The core army has nineteen tiles per player: one Duke, three Footmen, three Pikemen, and twelve unique specialists.
- Move, Jump, Slide, Jump Slide, Strike, and Command share the same compact 5×5 visual language but resolve in six different ways.
- Later releases and promotional sets added many troops and themes; this implementation deliberately freezes the 2013 core ruleset so positions and tests remain reproducible.
Sources and References
The material this page's rules implementation is based on.
- The Duke RulebookCatalyst Game Labs2013 core rules
Rights holder and physical editionCatalyst Game Labs